Picking the wrong beam angle ruins a good lighting plan. This creates harsh hot spots or gloomy, uneven light. But you can easily select the perfect angle to create beautiful, effective spaces.
The best beam angle depends on your goal. Use wide angles (like 60°) for general ambient lighting and narrow angles (like 24°) to highlight features. For a versatile and safe choice, a 36° beam angle provides a great balance for most applications, blending function and aesthetics.
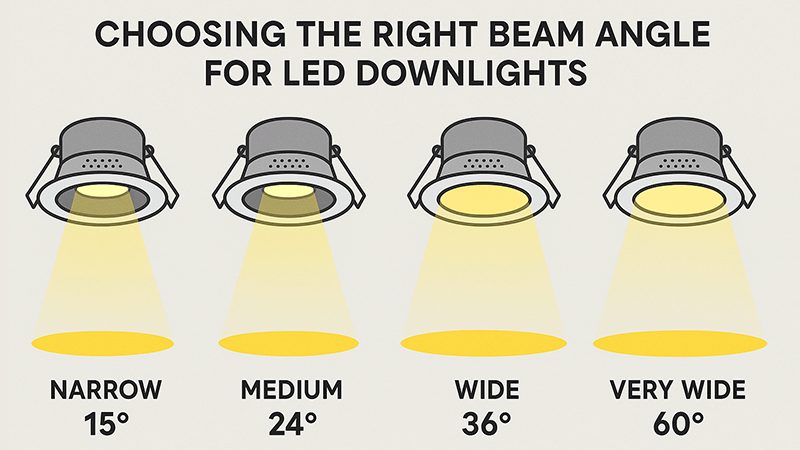
Choosing a beam angle is more than just picking a number from a spec sheet. It’s the most important tool you have for shaping how a room feels and functions. I’ve seen countless projects transformed by a simple change in beam angle. It’s the key to taking a lighting plan from average to exceptional. Understanding what these angles do is the first step to becoming an expert. So, let’s explore what these angles really mean for your projects.
What do the different beam angles for LED downlights mean?
You see numbers like 15°, 36°, and 60° on product sheets, but they often feel abstract. Picking the wrong one means your design fails, creating harsh spots or dim, uninviting areas. Let’s demystify these numbers so you can choose the right one every time.
A beam angle measures how wide a light spreads from the downlight. Narrow angles, typically under 25°, create focused spotlights for highlighting objects. Wide angles, over 40°, provide broad, general illumination ideal for lighting up entire rooms.
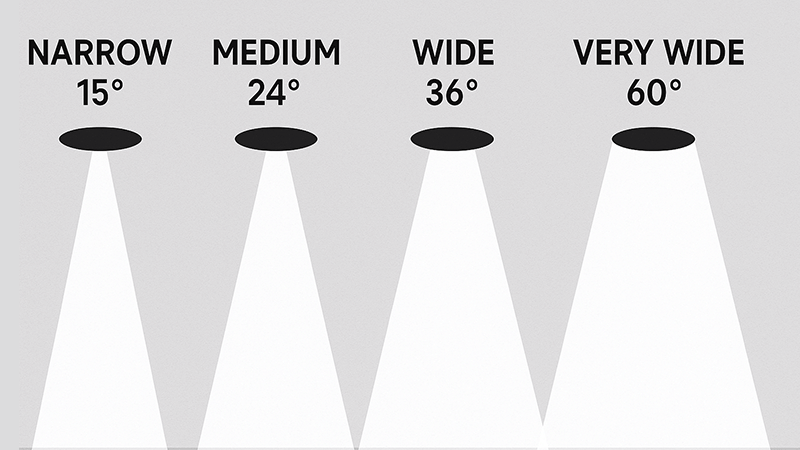
Think of a beam angle like the adjustable nozzle on a hose. You can have a tight, powerful jet or a wide, gentle spray. In lighting, this is the difference between a dramatic spotlight and soft ambient light. The angle is measured at the point where the light intensity drops to 50% of its center-point brightness. This is known as the Field Angle, and it’s what defines the main cone of usable light.
A key factor that many people forget is ceiling height. The same beam angle will create a much wider pool of light on the floor from a 3-meter ceiling than from a 2.4-meter ceiling. I always tell my clients, like Shaz, to consider this interaction. A 60° beam in a room with a low ceiling might create overlapping light and glare, while a 24° beam from a very high ceiling might create a small, lonely spot on the floor.
Narrow vs. Wide Beams
To make it simple, I’ve broken down the common beam angles and their typical uses. This is the starting point for all my lighting plans.
| Beam Angle Range |
Classification |
Primary Use Case |
Best For |
| 10° – 25° |
Narrow (Spot) |
Accent & Task Lighting |
Highlighting artwork, architectural details, retail displays, sculptures. |
| 26° – 45° |
Medium (Flood) |
General & Accent Lighting |
Living rooms, kitchens, offices, hallways. A versatile "all-rounder". |
| 46° – 60°+ |
Wide (Flood) |
Ambient & General Illumination |
Open-plan areas, conference rooms, lobbies, wall washing. |
By understanding these categories, you can start to layer your lighting. For example, in a gallery project I worked on, we used 15° downlights to make each painting pop, and 60° downlights in the walkways to ensure safe and comfortable navigation. This layering is what creates a professional, high-quality light environment.
Is a 36-degree beam angle a good choice?
You’re stuck choosing between a narrow spot and a wide flood, worried you’ll make the wrong call. This indecision can stall projects and lead to a safe but boring lighting result. But the 36-degree angle is what I often call the "sweet spot" in lighting design.
Yes, a 36-degree beam angle is an excellent and highly versatile choice. It perfectly balances focused task or accent lighting with comfortable ambient light, making it a safe and effective solution for many residential and commercial spaces.
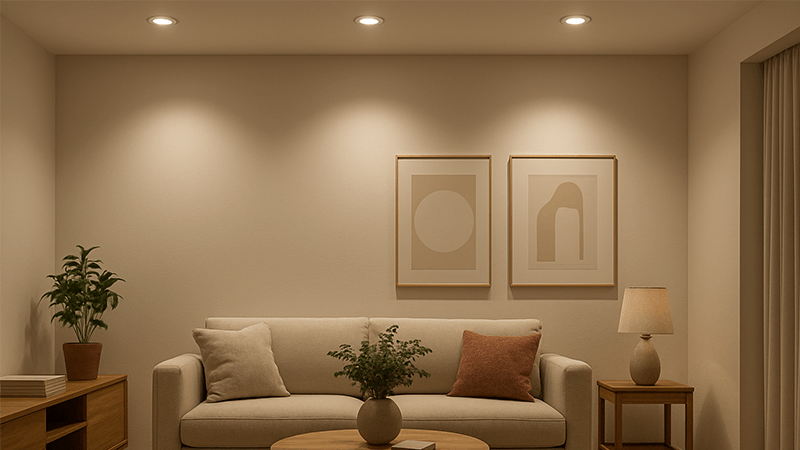
Why is 36 degrees so popular and effective? It’s the ultimate compromise. It’s not so narrow that it creates sharp, dramatic spots that can feel harsh in a home. It’s also not so wide that it flattens a room and eliminates all contrast and shadow. A 36-degree beam is wide enough to provide useful light on a kitchen counter but focused enough to be aimed at a bookshelf or a feature wall without spilling light everywhere. This balance is why it’s my go-to recommendation for clients who want a high-quality result without the complexity of using multiple beam angles.
For a purchasing manager like Shaz, standardizing on a 36-degree downlight for most applications can be a very smart move. It simplifies inventory, reduces the chance of installation errors, and still delivers a professional-looking result. I remember a large residential project where the contractor was overwhelmed with choices. I told him, "When in doubt, use 36 degrees, especially near walls." The result was fantastic. The light grazed the walls beautifully, adding texture and a sense of spaciousness, while also providing great functional light in the center of the rooms.
When to Use a 36-Degree Beam Angle
This angle is a true workhorse. It performs exceptionally well in a variety of situations.
- General Living Spaces: In living rooms and bedrooms with standard 2.4m to 3m ceilings, it provides a comfortable level of ambient light without feeling like an office.
- Kitchens: It’s perfect for lighting countertops. The beam is wide enough to illuminate the whole work surface but focused enough to avoid shining in your eyes.
- Hallways: Placing 36-degree downlights closer to the walls can create a "wall-washing" effect, making the space feel wider and more inviting.
- Retail and Hospitality: It can highlight merchandise or dining tables without creating the harshness of a very narrow spotlight.
A 36-degree beam gives you the best of both worlds. It provides enough focus to create interest and direct attention, but it’s soft enough for general, everyday living. It’s the safe bet that almost always pays off.
How do you calculate the beam angle of a light?
You need to know how large the light pool will be, but you don’t want to rely on guesswork. Installing a fixture only to find the light spread is wrong wastes time and money. Luckily, you don’t need to guess; you can calculate it with simple math.
To calculate the beam spread (the diameter of the light pool), use this formula: Beam Spread = 2 x Ceiling Height x tan(Beam Angle / 2). "Ceiling Height" is the distance from the downlight to the surface you’re lighting.
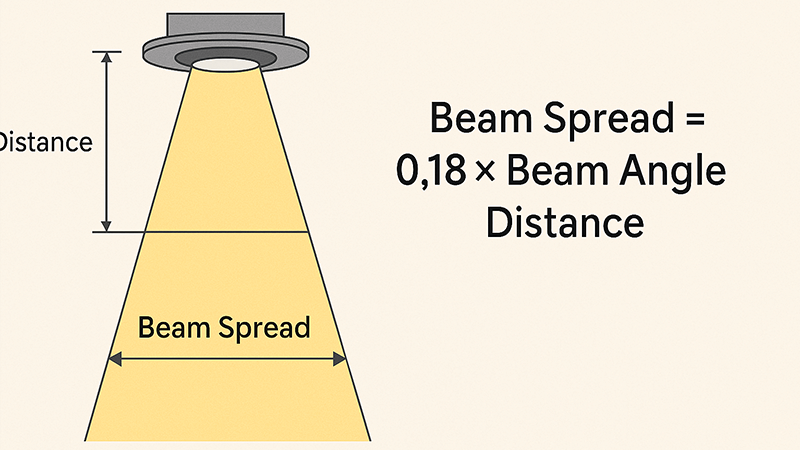
This formula might look complex, but it’s very straightforward. Let’s break it down. You need two pieces of information: the beam angle of your downlight (e.g., 36°) and the distance from the downlight to the surface you want to light (e.g., the floor or a countertop). This distance is your "ceiling height" in the formula.
For example, let’s say you have a 3-meter ceiling and are using a 36-degree downlight.
- Divide the beam angle by 2: 36° / 2 = 18°
- Find the tangent of that number: tan(18°) ≈ 0.325
- Multiply by the ceiling height: 3m x 0.325 = 0.975m
- Multiply by 2 to get the full diameter: 0.975m x 2 = 1.95 meters
So, a 36-degree downlight on a 3-meter ceiling will create a light pool approximately 1.95 meters wide on the floor. I’ve always found that doing this quick calculation saves me from major headaches later. It helps me determine the correct spacing between downlights to ensure even coverage without dark spots or overly bright overlaps.
Quick Reference Table for Beam Spread
To make it even easier, I’ve created a simple table for my clients. It shows the approximate beam spread diameter for common beam angles at different ceiling heights. This is a great tool for planning on the go.
| Ceiling Height |
24° Beam Spread |
36° Beam Spread |
60° Beam Spread |
| 2.4 meters |
~1.0m |
~1.5m |
~2.8m |
| 2.7 meters |
~1.1m |
~1.7m |
~3.1m |
| 3.0 meters |
~1.3m |
~1.95m |
~3.5m |
| 3.5 meters |
~1.5m |
~2.3m |
~4.0m |
All spread diameters are approximate.
With this table, you can quickly see how a 24° beam is great for focused tasks, while a 60° beam can cover a huge area, perfect for general ambient light from a high ceiling. This practical knowledge is what separates a good lighting installer from a great lighting designer.
What beam angle do I need for my space?
You now know what beam angles are, but you still have to choose the right one for your specific room. Making the wrong choice can mean a kitchen is too dark or a living room feels like a sterile office. Let’s create a clear plan for your space.
You need a mix of beam angles. Use wide (60°) for ambient light, narrow (24°) for accent lighting, and medium (36°) as a flexible default. The right choice depends entirely on the function of the space and the objects within it.
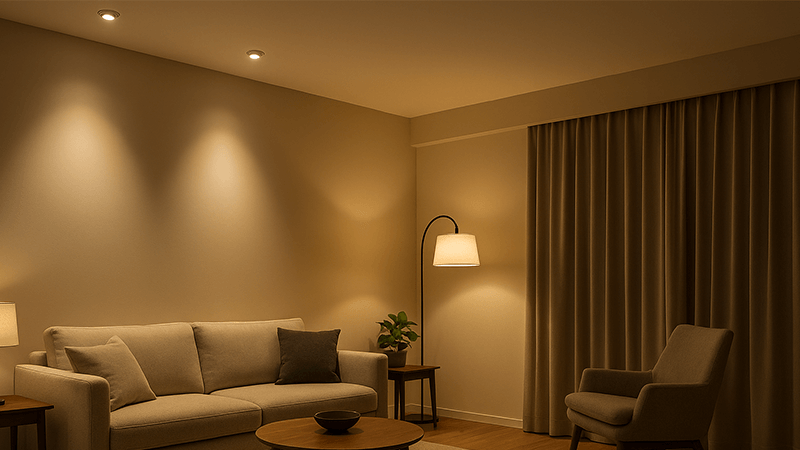
A sophisticated and layered lightingg environment](https://www.youtube.com/watch?v=I6fcG3NZS6U)[^10] is rarely achieved with a single beam angle. The real magic happens when you combine them. Think of it like painting a picture. You wouldn’t use just one brush, would you? You’d use a large brush for the background, a medium one for the main subjects, and a fine one for the details. Lighting is the same.
In my own home, I used this exact strategy. In the main living area, I installed 60° downlights in the center of the room to provide a soft, even base layer of light. This is our ambient light. Then, I used 24° spotlights aimed at the artwork on the walls. This is our accent light. The combination makes the room feel bright and spacious, but also interesting and full of character. The art becomes a focal point, drawing your eye and adding depth. This layered approach prevents the flatness that comes from using only one type of light.
A Practical Room-by-Room Guide
To help you decide, here is a simple guide for choosing beam angles in different rooms. This is the advice I give to project contractors to ensure they get it right.
| Room Type |
Primary Goal |
Recommended Beam Angle(s) |
My Professional Tip |
| Kitchen |
Task & General Light |
36° over counters/islands. 45°-60° for general circulation. |
Use narrower beams for task areas to minimize shadows and provide focused light where it’s needed most. |
| Living Room |
Ambient & Accent Light |
36°-45° for general use. 15°-24° for accenting features. |
Use dimmable downlights. This allows you to change the mood from bright and functional to soft and relaxing. |
| Bedroom |
Relaxing Ambient Light |
45°-60° for soft, overall light. |
Avoid placing downlights directly over the bed. Instead, light the perimeter of the room to reduce glare. |
| Bathroom |
Task & General Light |
36° over the vanity. 60° for the general area. |
Ensure your downlights are IP rated for wet locations, especially in or near the shower. |
| Hallway |
Navigation & Wall Wash |
36° spaced along one side to wash a wall. |
Washing one wall with light can make a narrow hallway feel much wider and more interesting. |
If you are feeling overwhelmed by the choices, here is my final piece of advice: unify most of your downlights to 36 degrees, especially those near walls. This is a highly cost-effective and mistake-proof strategy. It provides an excellent balance of function and beauty, easily creating a high-end feel for any home environment.
Conclusion
Choosing the right beam angle is crucial. Use wide angles for ambient light, narrow ones for accents, and 36° as a versatile default to create layered, professional, and beautiful lighting designs.