Picking floodlights feels complicated. A wrong choice means wasted money and poor lighting. I will help you understand the key factors to make the right decision for your project.
To choose the best LED floodlights, you must match the wattage and lumens to your area’s size and purpose. More importantly, for true durability, you must verify the material quality, such as die-cast aluminum housing and stainless steel screws, to prevent corrosion in harsh environments.
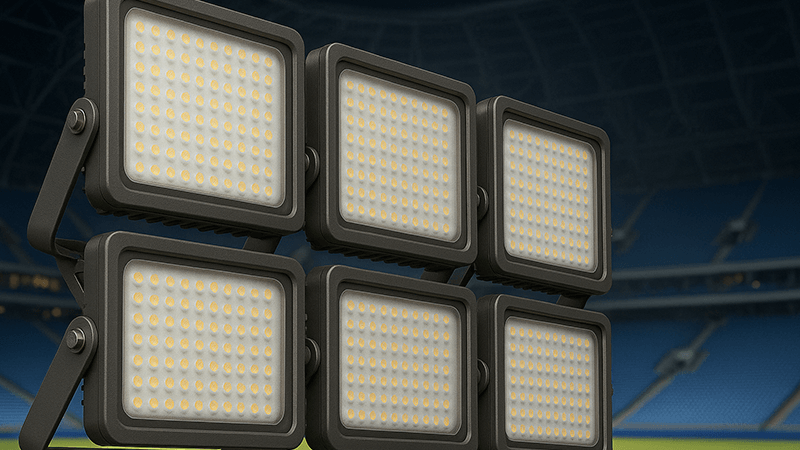
Choosing the right light can feel like a big challenge. There are many technical details to consider. But it becomes much simpler when you break it down into a few key questions. Over my years of manufacturing lights, I’ve found that customers get the best results when they answer these questions one by one. I have helped many clients navigate this process, ensuring they get lighting that is not only bright but also lasts for years. Let’s start with the most common question I hear from purchasing managers and project contractors.
What size LED floodlight do I need?
Choosing the right floodlight size can feel like a guess. If you guess wrong, you end up with dark, unsafe spots or areas that are unpleasantly bright.
The "size" of an LED floodlight refers to its power (wattage) and brightness (lumens), not its physical dimensions. For large areas, you often need 150W to 400W fixtures. The exact size depends on the area’s dimensions, pole height, and required brightness level.
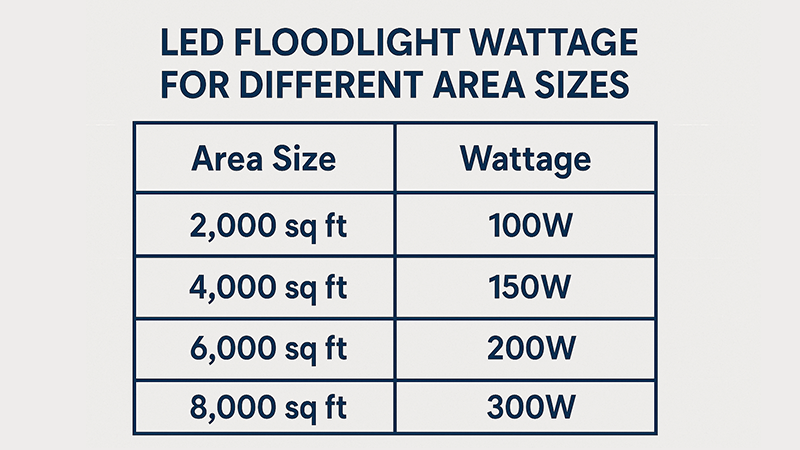
When people ask for a "big" or "small" floodlight, they are usually talking about its power. Let’s break down what really determines the right size for your outdoor space. It’s a mix of a few simple factors. In my experience, getting this part right at the beginning saves a lot of time and money later on.
Understanding "Size" as Power and Light
First, we need to stop thinking about physical measurements. In the lighting industry, size means wattage (W) and lumens (lm). Wattage tells you how much electricity the light uses. Lumens tell you how much light it produces. A higher wattage usually means higher lumens, but efficiency matters. A high-quality 200W floodlight might produce more lumens than a low-quality 250W one. When I work with clients like Shaz in the UAE, we always focus on the lumen output needed for the job first, then find the most efficient wattage to deliver it.
Matching Size to Your Area
The right size depends entirely on your specific needs. You need to consider the area’s dimensions, the mounting height of the lights, and what the space is used for. A small parking lot for 20 cars has very different needs than a large commercial port. I remember a client who wanted to light a huge storage yard. They thought they needed dozens of 150W lights. We ran a lighting simulation and found that fewer, more powerful 300W lights on taller poles would give them better, more even coverage and actually cost less overall.
Here is a simple table to give you a starting point:
| Area Type |
Recommended Wattage |
Typical Pole Height |
| Small Parking Lot (10-20 cars) |
100W – 150W |
15-20 ft (4.5-6m) |
| Large Parking Lot (50+ cars) |
200W – 400W |
25-30 ft (7.5-9m) |
| Sports Field (Recreational) |
400W – 600W |
40-60 ft (12-18m) |
| Building Facade |
50W – 150W |
Varies |
This table is a guide, but every project is unique. The best way to be certain is to do a proper lighting plan.
How far will a 200W LED flood light reach?
You invested in a powerful 200W floodlight. But will the light actually reach the far corners of your property? A light that doesn’t reach far enough is wasted.
A 200W LED floodlight’s reach is determined by its beam angle and mounting height, not just its power. Mounted at 20-25 feet (6-8 meters), it can effectively light up an area 60-80 feet (18-24 meters) away, especially with the right optics.
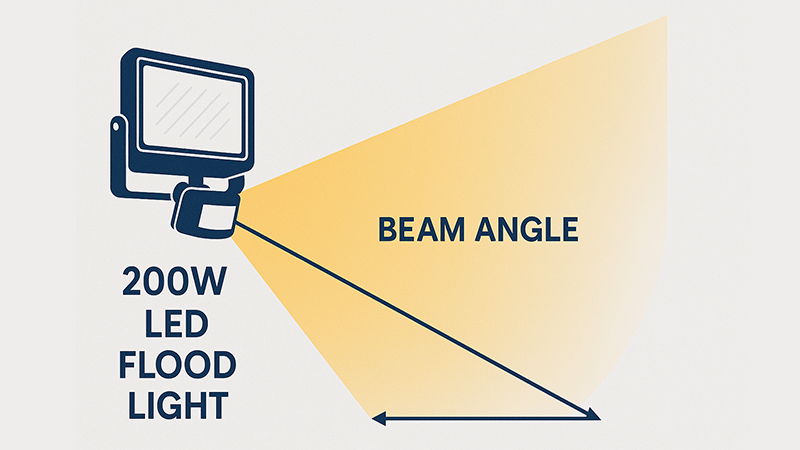
Many people think more watts automatically means more distance. That’s a common mistake. The "reach" of a floodlight is really about how the light is shaped and directed. In my factory, we have dozens of lens options for the exact same light fixture. This is because the lens, or optic, is what truly controls the light. A powerful light with the wrong lens is like a strong person trying to throw water without a hose nozzle. It just goes everywhere and doesn’t get the job done. Let’s look at the two factors that you can control to get the distance you need.
The Critical Role of Beam Angle
The beam angle is the most important factor for determining a floodlight’s reach. Think of it like a camera lens. A wide-angle lens captures a big scene close up. A telephoto lens focuses on something far away. Floodlight optics work the same way.
- A wide beam angle (like 90° or 120°) spreads the light over a large area nearby. It is great for general illumination but the light intensity drops off quickly with distance.
- A narrow beam angle (like 30° or 60°) concentrates the light into a more focused beam. This beam travels much further, making it perfect for lighting objects at a distance or illuminating long, narrow spaces.
A project contractor in a free-trade zone once needed to light a long perimeter fence. They were about to order standard 120° floodlights. I suggested they use the same 200W wattage but with a custom 45-degree lens. This focused the light exactly along the fenceline, which meant they could space the poles further apart. This small change saved them thousands of dollars in poles, fixtures, and installation costs.
How Mounting Height Affects Reach
Where you place the light is just as important as the light itself. Mounting the floodlight higher up has a significant effect on its coverage and reach. Imagine holding a flashlight. If you hold it close to the ground, you get a small, very bright circle. As you raise the flashlight, the circle of light gets larger and dimmer, but it covers more ground.
This simple principle helps us create a better lighting plan.
| Mounting Height |
Beam Angle |
Approximate Effective Reach |
Best Use Case |
| 20 ft (6m) |
60° |
~65 ft (20m) |
Focused area lighting |
| 20 ft (6m) |
120° |
~45 ft (14m) |
Wide general lighting |
| 30 ft (9m) |
60° |
~90 ft (27m) |
Long-distance throw |
| 30 ft (9m) |
120° |
~60 ft (18m) |
Large area coverage |
So, a 200W floodlight’s reach is a flexible thing. By choosing the right beam angle and mounting height, you can make that single fixture perform many different jobs.
How many lumens for an outdoor area?
You see terms like lumens, lux, and watts thrown around. It is confusing. How do you know how bright your space really needs to be without overspending or creating a safety hazard?
The lumens you need depend on the area’s size and use. A simple formula is: Area (in sq. ft.) x Required Foot-Candles = Total Lumens. For security, 1-2 foot-candles is often enough. For commercial lots, you might need 5-10 foot-candles.
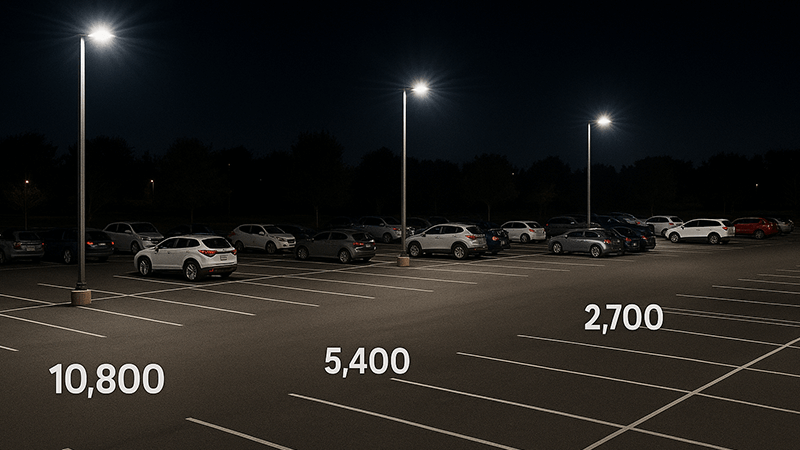
Let’s clear up the confusion around brightness. Lumens are not the only number to look at. The goal is to achieve a certain level of light on the ground, which is measured in foot-candles or lux. This is what determines if a space feels safe and well-lit. For every project I consult on, from small businesses to large industrial sites, we always start by defining the required light level on the ground. It is the foundation of a successful lighting design.
Defining Lumens, Lux, and Foot-Candles
These three terms are related but different.
- Lumens (lm): This is the total amount of visible light produced by a single light source. It’s a measure of the lamp’s total output.
- Foot-Candles (fc): An imperial unit measuring light intensity on a surface. One foot-candle is one lumen per square foot. This tells you how bright the ground or a wall actually is.
- Lux (lx): The metric equivalent of foot-candles. It measures lumens per square meter. The conversion is simple: 1 foot-candle is approximately 10.76 lux.
As a purchasing manager, knowing the target foot-candle or lux level is more powerful than just knowing the lumens of a fixture. It allows you to compare different proposals and lighting plans effectively.
Calculating Your Lumen Needs
You can get a good estimate of the total lumens required with a straightforward calculation.
- Measure your area: Calculate the total square feet (or square meters) of the space you need to light.
- Determine the required brightness: Decide on the necessary foot-candles (or lux) based on the area’s purpose.
- Multiply them: The formula is:
Area (sq. ft.) x Desired Foot-Candles = Total Lumens Needed.
For example, a 10,000 sq. ft. parking lot that needs an average of 5 foot-candles of light will require a total of 50,000 lumens. This 50,000 lumens can be delivered by five fixtures producing 10,000 lumens each, or ten fixtures producing 5,000 lumens each. This calculation gives you a target for your entire project.
Here are some common recommendations that we use in professional lighting designs:
| Application |
Recommended Foot-Candles |
Recommended Lux (approx.) |
| General Security / Pathways |
1 – 2 fc |
10 – 20 lux |
| Residential Parking Lot |
2 – 5 fc |
20 – 50 lux |
| Commercial Parking Lot |
5 – 10 fc |
50 – 100 lux |
| Car Dealership Front Line |
15 – 20 fc |
150 – 200 lux |
| Sports Area (Recreational) |
20 – 30 fc |
200 – 300 lux |
For my clients with large or complex projects, we take this a step further. We use special software called DIALux to build a 3D model of their site. This simulation shows exactly how the light will fall and guarantees the final result before they spend a single dollar on hardware.
How to determine flood light quality?
You have figured out the wattage and lumens. But many lights look the same on paper. How can you be sure the floodlight you choose will actually last, especially in a tough environment?
Look beyond the tech specs and focus on the materials. A quality floodlight uses die-cast aluminum, stainless steel screws, and a multi-layer powder-coated finish. These are the details that prevent failure.
The single most overlooked factor is corrosion resistance. High IP ratings (IP65/IP66) stop dust and water, but they do nothing to stop rust and corrosion from salt spray or chemical fumes. This is the detail that determines if a light survives past its first year.
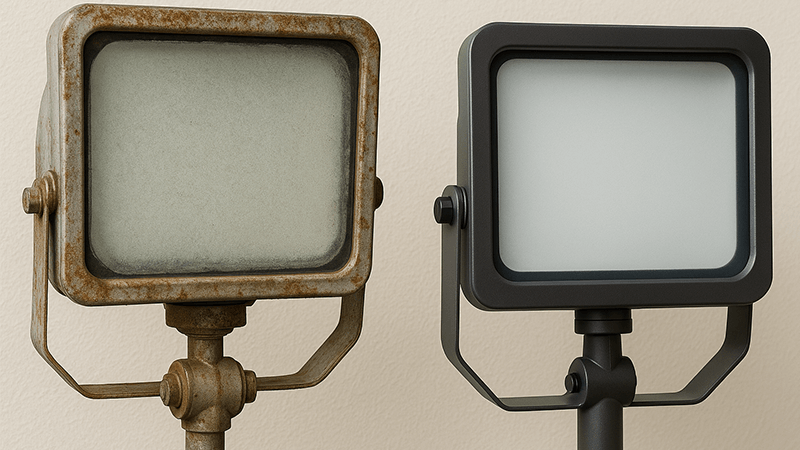
This is where my experience as a manufacturer becomes most valuable. I have seen thousands of floodlights fail, and it’s rarely the LED chip that dies first. It’s the body, the screws, and the seals. A purchasing manager might see two 200W floodlights with the same IP66 rating and assume they are equal. They are not. One might last ten years, and the other might be a rusty box in two. The difference is in the materials, a detail often hidden in the spec sheet.
The IP Rating Trap
Everyone asks for IP65 or IP66. It is a good starting point. It means the fixture is sealed against dust and jets of water. But this test is done in a lab with clean water. It does not account for the salty, humid air in a coastal city like in the UAE, or the chemical fumes in an industrial zone. I have seen IP66 lights on a seaport project fail within two years. Why? The steel screws used to seal the housing rusted away. Once the screws fail, the waterproof seal is broken, and the light is finished. The IP rating became meaningless because the materials could not resist corrosion.
Material Quality is Everything
The long-term survival of a floodlight comes down to its construction. These are the non-negotiable features I build into my own products and tell clients to look for.
- Housing: Insist on heavy-duty die-cast aluminum. It is stronger and dissipates heat far better than cheaper, stamped aluminum. Better heat management means the LED chips and driver last much longer.
- Fasteners & Hardware: This is my most important piece of advice. All external screws, bolts, and brackets must be stainless steel. Use grade 304 for most applications and grade 316 for coastal, marine, or chemical environments. This small detail is the number one defense against premature failure from rust.
- Coating: A simple layer of paint is not enough. A quality fixture will have a multi-stage finish, often a polyester powder coating over a chromate conversion layer. This "armor" resists chipping, fading, and provides a robust barrier against corrosion.
This table shows exactly where cheap lights cut corners:
| Component |
Low-Quality Floodlight |
High-Quality Floodlight |
Why it Matters |
| Housing |
Stamped or thin aluminum |
Heavy-duty Die-Cast Aluminum |
Better heat dissipation and structural integrity. |
| Fasteners (Screws) |
Galvanized Steel |
Stainless Steel (304 or 316) |
Prevents rust, which is the #1 cause of seal failure. |
| Coating |
Single layer of spray paint |
Multi-stage powder coating |
Prevents peeling and protects the metal from corrosion. |
| Gaskets |
Basic foam or rubber |
High-grade Silicone |
Stays flexible without cracking, ensuring a long-term waterproof seal. |
I once helped a client who was responsible for a large port. Their existing lights were failing constantly. We opened one up, and the inside was full of brown, rusty water. The supplier had used cheap plated screws. We replaced them with new fixtures built with 316 marine-grade stainless steel hardware. The problem was solved. Paying attention to these material details is how you purchase lighting for reliability, not just for brightness.
Conclusion
Choose the right wattage and beam angle for your space. But most importantly, always demand high-quality, corrosion-resistant materials. This ensures your investment will continue to perform for many years.