Last Updated on: September 1, 2025Choosing the wrong beam angle for your project is a costly mistake. You end up with dark spots, annoying glare, or wasted energy, leading to unhappy clients and damaging your reputation.
To choose the right LED floodlight beam angle, you must match it to the mounting height and the size of the target area. A narrow beam (e.g., 30°) is for long distances or small spots, while a wide beam (e.g., 120°) is for large areas at shorter distances.
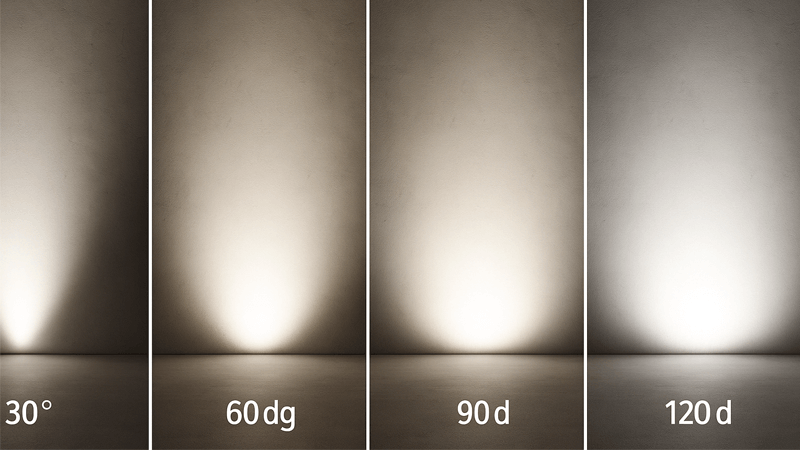
I’ve been manufacturing LED lights for over a decade, and I’ve seen firsthand how a simple number—the beam angle—can make or break a lighting project. It looks like a small detail on a spec sheet, but it controls where every single lumen goes. Get it right, and you look like a genius. Get it wrong, and you’re dealing with expensive callbacks. It’s not just about covering an area with light; it’s about the quality of that light, the experience it creates, and even the efficiency of your business. Let’s dive deeper into how you can master this critical choice.
How do you choose a light beam angle?
Do you find yourself guessing between narrow, medium, and wide beam angles? This guesswork leads to either concentrated hot spots or dim, inefficient light spill that illuminates nothing of value.
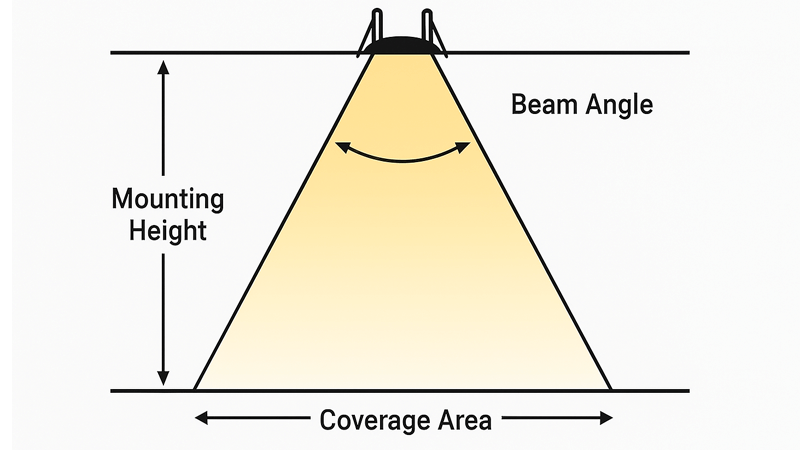
A good starting point is a simple calculation: match the beam angle to the mounting height and the desired coverage area. For a quick estimate, use wider beams for shorter poles and wider areas, and narrower beams for taller poles or focused targets. This ensures efficient, uniform light.
The Essentials of Beam Angle Selection
The core of choosing a beam angle is a relationship between three things:
- Mounting Height: How high will the fixture be?
- Target Area Size: How wide is the surface or area you need to light?
- Desired Light Level (Lux): How bright does it need to be?
A narrow beam concentrates light (high lux) over a small area, making it perfect for throwing light a long way. A wide beam spreads the same amount of light over a much larger area, resulting in lower lux levels but broader coverage.
Here is a basic guide I give my clients to help them start the conversation:
| Application |
Typical Mounting Height |
Recommended Beam Angle |
Why It Works |
| Flagpole Lighting |
10m – 25m |
10° – 30° |
A narrow beam focuses all the light on the flag from a distance. |
| Building Facade |
5m – 15m |
30° – 60° |
Creates a uniform wash of light without excessive light spill. |
| Small Parking Lot |
6m – 8m |
90° – 120° |
Provides wide, even coverage from fewer poles. |
| Security Lighting |
3m – 6m |
>100° |
Maximizes the illuminated area to eliminate shadows and hiding spots. |
But there’s a hidden factor many purchasing managers miss: Color-Over-Angle (CoA) Integrity. I once had a client in the UAE, a lot like you, who was lighting a new luxury hotel facade. He used a fixture from another supplier and the color was inconsistent. From the ground, some parts of the wall looked warm white, while the edges of the beam appeared slightly blueish. The problem wasn’t a bad LED chip; it was poor optic design. The lens was causing color separation at the edge of the beam. For high-end projects where appearance is everything, you must ask your supplier for CoA data. A good quality optic will maintain a consistent color temperature (CCT) across the entire beam.
Should the beam angle be 60 or 120 degrees?
You’re looking at two spec sheets, one with a 60° beam and one with 120°. The choice seems small, but this decision completely changes the light’s performance and the visual comfort of the space.
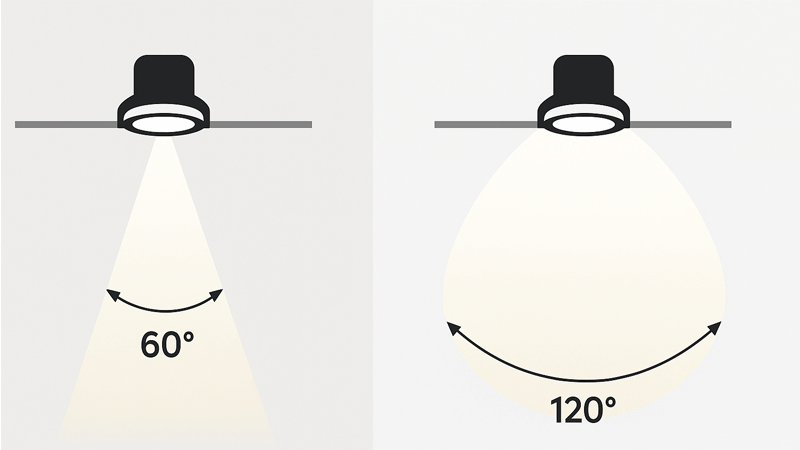
Choose a 60° beam for targeted illumination, like highlighting architectural columns or signage from a medium distance. Pick a 120° beam for broad, uniform lighting of wide-open spaces like parking areas or work yards, where you are mounting the lights relatively low.
A Tale of Two Angles: Focus vs. Forgiveness
The difference between 60° and 120° is massive in practice. Think of it like the nozzle on a water hose. The 60° beam is a strong, focused jet, while the 120° is a wide, gentle spray.
| Feature |
60° Beam |
120° Beam |
| Light Intensity |
High, concentrated |
Lower, spread out |
| Coverage Area |
Smaller |
Much larger |
| Best For |
Targeting objects, long-throw |
General area lighting, short-throw |
| Installation |
Requires precise aiming |
Very forgiving |
This brings me to two critical insights I’ve learned from years of troubleshooting projects. First, Glare as a Vector. Many people assume a 120° beam creates more glare because it’s so wide. Often, the opposite is true. A poorly aimed 60° beam is like a spotlight in someone’s eyes—it’s a focused, intense vector of light that is incredibly uncomfortable. The wide 120° beam might cause general brightness, but the narrow beam causes direct, disabling glare if aimed incorrectly.
Second is The Installer’s Reality. This is a hidden cost. A 120° floodlight is easy to install. The electrician can point it in the general direction and the whole area is lit. It’s very forgiving. A 60° beam, and especially anything narrower, needs to be aimed perfectly. If the installer is off by just a few degrees, the light completely misses the target. This requires more time, more skill, and possibly special equipment like laser pointers for aiming. When you specify a narrow beam, you must consider if the installation team has the skill to execute it properly. I always advise my project partners to factor in the installation complexity when choosing between a focused or a forgiving beam.
What is the angle of a flood light beam?
The term "floodlight" makes you think of a wide wash of light, but is that always the case? Assuming all floodlights have a very wide beam is a common mistake that leads to mismatched products and poor results.
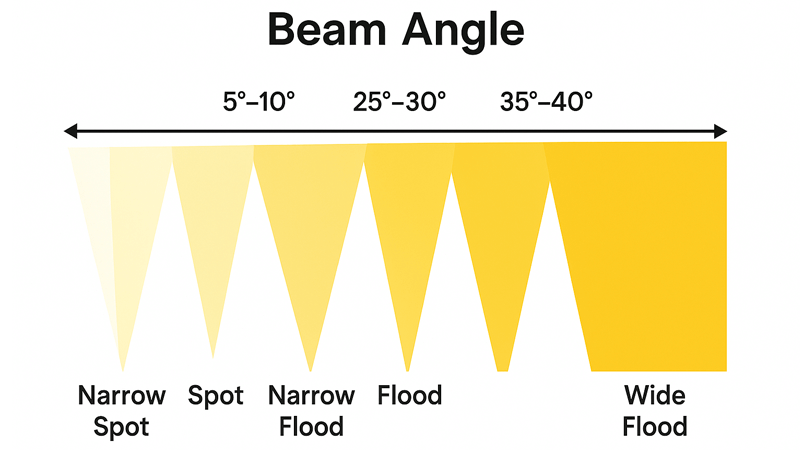
A "floodlight" doesn’t have one specific angle. The beam angle can range from a very narrow spot (under 10°) to a very wide flood (120° or more). The name refers to the fixture’s power and application, not a single beam characteristic.
From Spot to Flood: A Spectrum of Choice
In the lighting industry, we classify beam angles to make it easier to specify the right product for the job. It’s also important to understand the difference between Beam Angle and Field Angle. The Beam Angle is where the light intensity drops to 50% of its center brightness. The Field Angle is a wider cone where the light drops to 10%. For most applications, you should focus on the beam angle for effective illumination.
Here’s how we generally break it down in my factory:
| Classification |
Angle Range |
Common Applications |
| Narrow Spot (NSP) |
15° – 30° |
Highlighting statues, architectural details, flags |
| Spot (SP) |
30° – 45° |
Tree uplighting, building accent lighting |
| Flood (FL) |
45° – 70° |
Building facades, small area lighting, sign washing |
| Wide Flood (WFL) |
70° – 120° |
Large parking lots, sports fields, construction sites |
This huge variety presents a challenge for both manufacturers like me and distributors like you. This is what I call The Strategic Cost of Choice. If I need to manufacture and stock a floodlight in 4 different wattages and 5 different beam angles, that’s 20 different SKUs (Stock Keeping Units). The inventory cost is enormous! The solution that is changing the industry is the modular optics revolution. Instead of producing 20 different finished products, we manufacture one housing and a variety of low-cost, interchangeable lenses. As a purchasing manager, this is a huge advantage for you. You can stock one base fixture and a set of lenses. This lets you create a 30°, 60°, or 90° light on demand, reducing your inventory and increasing your project flexibility. We helped one of our European partners implement this, and it cut their floodlight inventory costs by over 40%.
How do you make a right angle with LED lights?
Do you need to create sharp, defined lines of light for a dramatic effect? Standard floodlights often produce soft, fuzzy edges that wash out architectural details and look unprofessional.
To create a sharp "right angle" or clean cut-off line, you must use fixtures with specialized optics like asymmetric or TIR lenses. You can further refine the beam shape and eliminate spill light by using accessories like barn doors or glare shields.
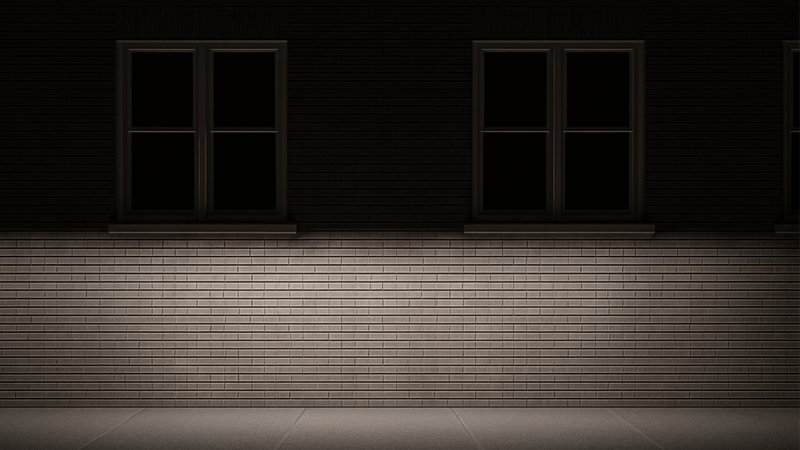
The Art of Light Control: Shaping the Beam
When we talk about making a "right angle" with light, we aren’t bending light beams. We are talking about creating a very sharp cut-off to precisely control where the light starts and stops. This is crucial for applications like wall grazing, pathway lighting, and preventing light trespass into neighboring properties.
There are two main technologies to achieve this:
-
Asymmetric Optics: A standard floodlight produces a symmetrical, circular, or conical beam. An asymmetric optic is designed to throw light forward and down. Imagine placing a light on the ground to illuminate a tall wall. An asymmetric lens directs the light up the wall, not wasting it on the ground or into the sky. This is the key technology used in modern street lights and wall-washer fixtures. They create a rectangular pattern of light on the ground, creating clean lines.
-
Total Internal Reflection (TIR) Optics: These are highly engineered lenses that sit directly over the LED chip. They use reflection and refraction to capture almost all of the light produced and direct it into a very precise beam. Fixtures with high-quality TIR optics have minimal "spill light" or "field angle," resulting in a very sharp, clean beam with high punch.
On top of the lens technology, you can use physical accessories for even more control. A set of barn doors—four adjustable metal flaps—can be used to shape the beam into a specific rectangle. A snoot or shield can cut off light in one direction to prevent glare. I worked on a historical building project where we had to illuminate the facade perfectly but were forbidden from spilling any light onto the centuries-old windows. By using floodlights with a 30° TIR optic and external glare shields, we were able to create a stunning effect that respected the building’s integrity. For a professional like you, sourcing fixtures that have these optic and accessory options gives your team the tools they need to solve complex lighting challenges on-site.
Conclusion
Choosing the right beam angle is more than a technical detail. It impacts visual quality, energy efficiency, installation cost, and even your inventory strategy. Master it, and your projects will be brilliant.